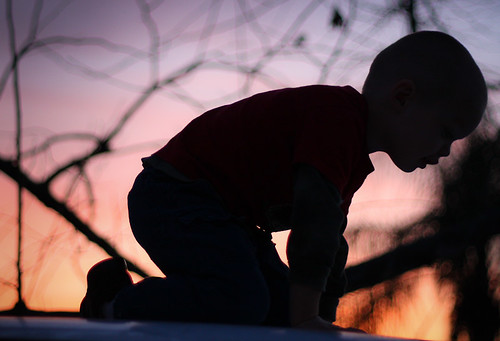
I really like this shot. One of those moments that I didn't intend to capture but it just happened. The boys are up on top of my truck. The sun is setting and I am trying to see what I can get in such low light. The minute I took it, I knew it was a good one. At least to me that is.
I worked on it a little in LR2. Brought up the blacks a little added the gradients from 3 sides.
Be blessed.
Labels:
family portraits,
sillhouette,
sunset
|


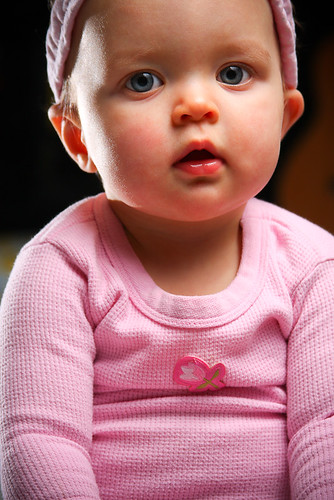
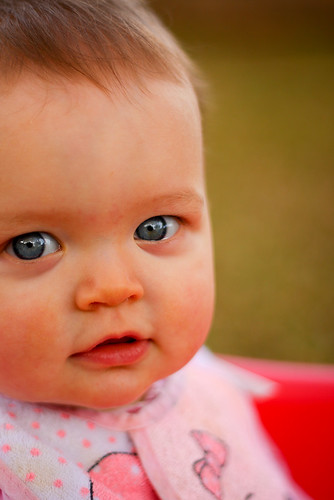
I am very happy with this one. Got this one last night. Mommy took the boys out on a toy run and Maggie and I had a photo shoot. Poor thing has a cold so she had redness on her cheek and chin from the snot (sorry, too much info).
The lighting setup is two-lights. One 285HV into a white shoot-thru umbrella camera right @ 1/4 power. Very close to the subject. And a bare 540EZ camera left and behind for the accent light. I am going to try to include a lighting diagram created at http://www.qhphotography.com/Resources/Online-Tools/Lighting-Diagram which is a really neat tool.
In Photoshop, I had to fix the red areas on her face. I tried selecting and apply curves to the red channel but could never seem to get the right selection. So I was removing red in areas that I didn't want to do that. So I ended up using the healing tool with good success. If you have better ideas about this, please let me know.
So here is the lighting diagram.

Labels:
multiple lights,
portraits,
rim light,
shoot thru
|
Hey all,
I am looking for some help from you all. I will be traveling to Ecuador in April on a mission trip. I plan to take a bunch of pictures. So I am looking for input. Have you traveled to Ecuador? Can you give some tips for travel photography? Have you read any great books on the topic? Seen any great websites on the subject?
I am really looking forward to the trip and want to be well prepared. I am sure I'll be busy working but I plan to always have my camera ready.
Please help me out.
Be blessed.
|
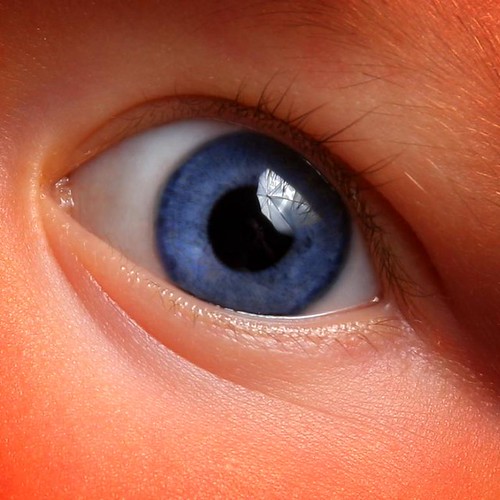
This was maybe the first shot I have taken with every intention of doctoring it in post-processing (I use the Gimp and Photoshop depending on what computer I am on).
My daughters eyes are blue and if she is wearing blue, they look very intense. But she wasn't wearing blue last night and was eating so Daddy couldn't change her wardrobe.
My other issue is not having a macro lens. So this is cropped quite a bit from the original.
In the Gimp, I started by removing stray hairs and such. Duplicated the layer and started working on the eye color that I was looking for. So I got into color-balance and moved the yellow slider presumably to remove yellow leaving more blue. That interface was not very intuitive for me.
Now that I have the color of the eye, it is just a matter of applying a layer mask filled with black and then using a soft paintbrush with white to uncover the area of the eye that I wanted to change.
To finish, I added a vignette. I don't think I even sharpened this. I meant to but forgot.
Labels:
closeup,
eye,
gimp,
one light
|